Users
Updated
The users, designations and roles a Tamanu deployment needs. Users and designations are configured
through the reference data import spreadsheet, and roles through the Role tab of the permissions
matrix spreadsheet, both downloaded from and uploaded to the admin panel. Each can also be managed one
record at a time on the Users screens of the admin panel.
For the settings that control facility access and which permissions apply see Settings, and for granting permissions to roles see Permissions.
Reference Data Types
See the Tamanu Reference Data Manual for how importing works.
Set up in this order, since each type refers to the ones before it:
- Roles, on the
Roletab of the permissions matrix - Designations
- Facilities, covered in the Deploying Tamanu configuration guides
- Users
- Permissions, on the
Permissiontab of the permissions matrix. See Importing the permissions matrix
Role
A role groups users who do the same kind of work, such as Doctor, Nurse or Admin. Each user has
one role, and the permissions matrix grants permissions to roles rather than to individual users.
| Field | Value |
|---|---|
| Tab name | Role |
Where * is a required field.
| Column name | Description |
|---|---|
| id * | Unique id for the role. Letters, numbers and hyphens only. This id is the column header for the role on the Permission tab and the value of a user's role column. |
| name * | Name for the role, displayed when choosing a user's role. |
The Role and Permission tabs are imported together on the Import tab of the Permissions
screen in the admin panel, not the Reference data screen. The Role tab is read first, so a
role can be added and given permissions in a single import. See
Importing the permissions matrix.
Managing roles in the admin panel
Roles can also be added and deleted on the Roles tab of Users > Roles & designations:
- Select Add role and enter an ID and Name. The id must not already be in use
- Select the menu against a role, then Delete, to remove it. A role cannot be deleted while any user, including a deactivated user, is assigned to it: the screen lists those users, and each needs a different role first
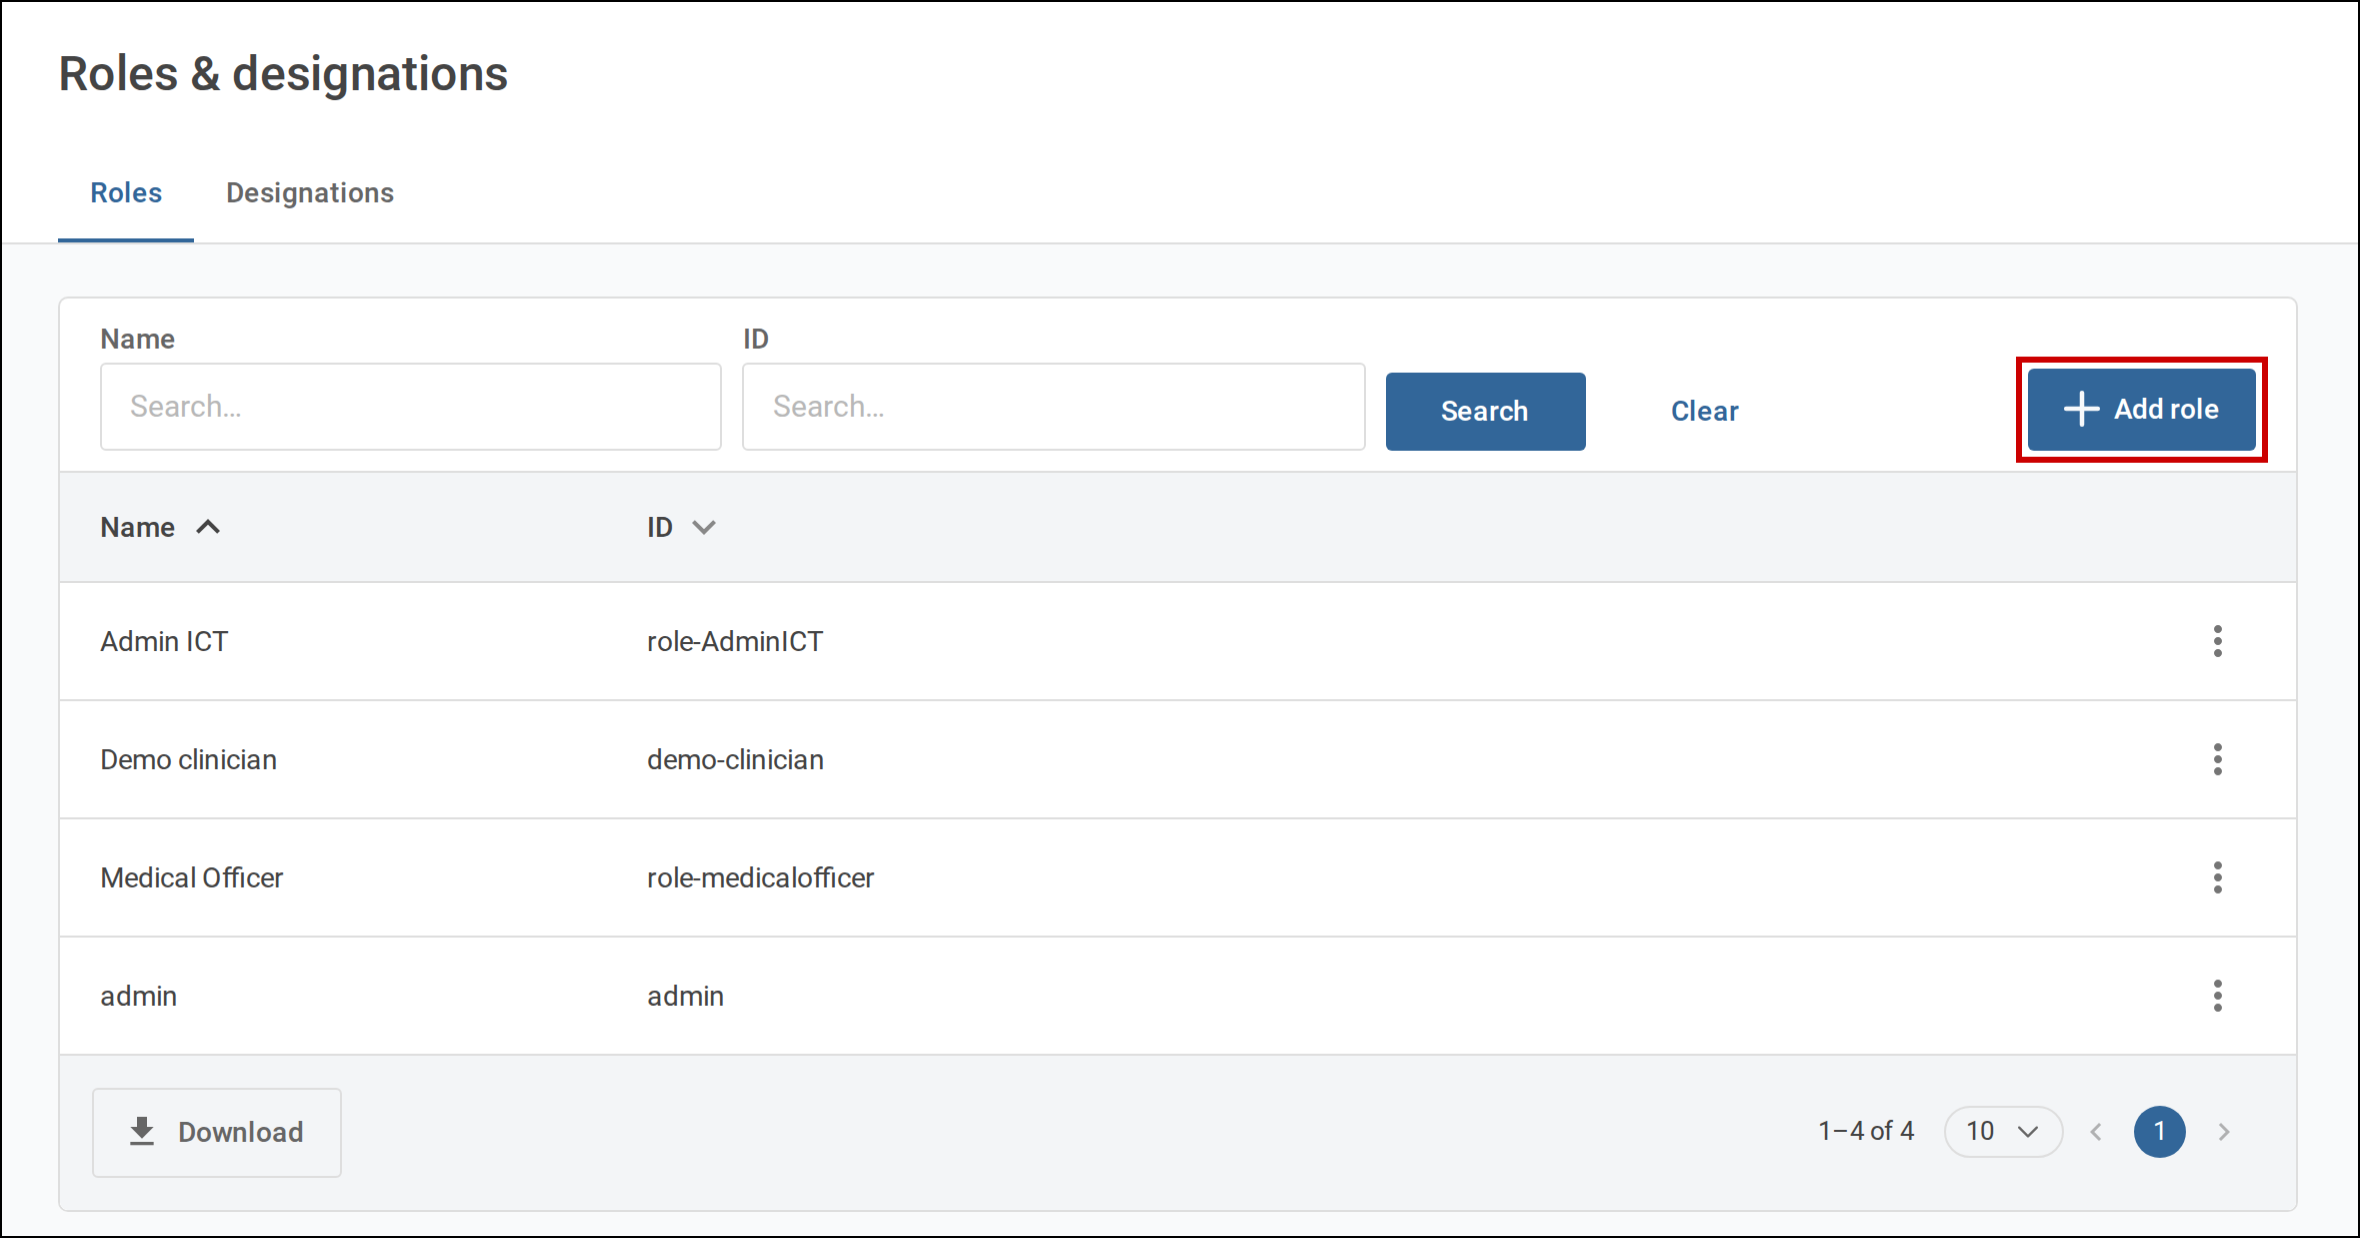
A role's name cannot be changed on this screen. Change it on the Role tab and re-import.
Designation
A designation describes a user's job, such as Nurse, Senior Nurse or Midwife, independently of
the role that sets their permissions. Tasks are assigned to designations, so the designation decides
whose task list a task appears in. See the Tasks configuration guides. A user can hold
several designations, or none.
| Field | Value |
|---|---|
| Tab name | Designation |
Where * is a required field.
| Column name | Description |
|---|---|
| id * | Unique id for the designation, for example designation-Nurse. Letters, numbers and hyphens only. This id is the value used in a user's designations column. |
| code * | Code for the designation. Letters, numbers, hyphens, full stops and forward slashes only. |
| name * | Name for the designation, displayed on user profiles and tasks. |
| visibilityStatus | current for designations in use, or historical for designations that should no longer be assigned. Defaults to current if blank. Only current designations can be assigned to a user. |
| availableFacilities | Accepted on every reference data type, but has no effect on designations. Leave blank. |
Managing designations in the admin panel
Designations can also be added and deleted on the Designations tab of Users > Roles & designations:
- Select Add designation and enter an ID, Code and Name
- Select the menu against a designation, then Delete, to remove it. A designation cannot be deleted while any user or task is assigned to it: the screen lists them, and each needs updating first
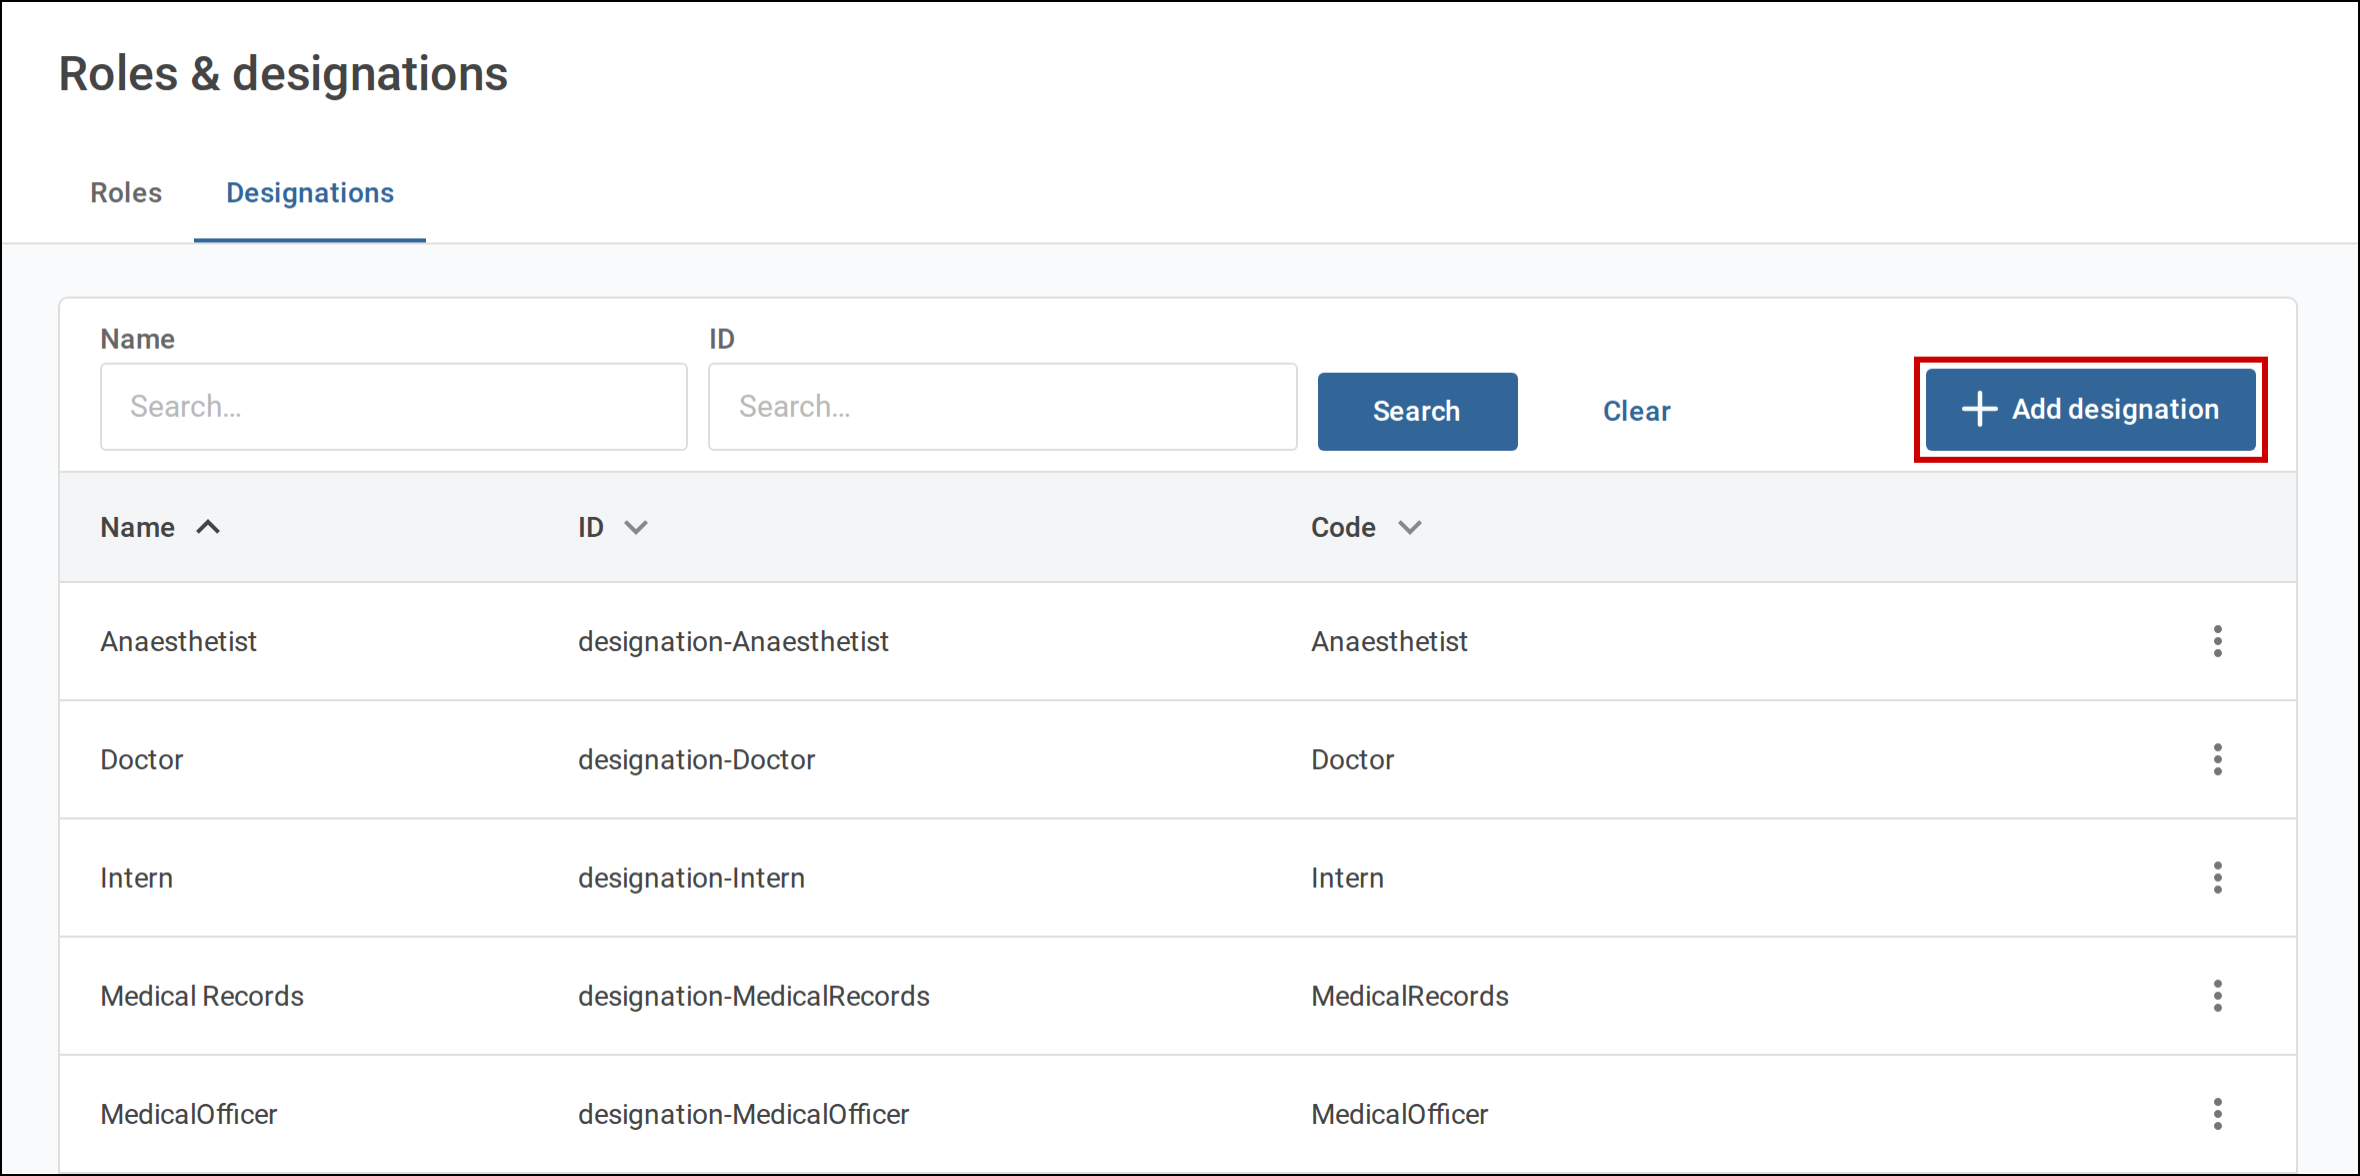
Designations are reference data, so they can also be edited on the Manage tab of the Reference data screen.
User
A user is an account a person logs in to Tamanu with. Their name is recorded against everything they do, and appears wherever staff choose a clinician.
| Field | Value |
|---|---|
| Tab name | User |
Where * is a required field.
| Column name | Description |
|---|---|
| id * | Unique id for the user, for example user-jsmith. Letters, numbers and hyphens only. Cannot be changed once the user exists. |
| displayId | A registration or staff number for the user, such as a medical council number. Printed on prescriptions. Leave blank if not required. |
| email * | The email the user logs in with. Must be unique across all users. Not case sensitive when logging in. |
| displayName * | The user's name as displayed throughout Tamanu. The importer does not check that it is unique, but the User profiles screen does, so keep display names distinct. |
| role | The id of the user's role, from the Role tab. Defaults to practitioner if blank. This column is not validated on import, so a role id that does not exist is accepted and the user can do nothing in Tamanu. |
| phoneNumber | The user's phone number. Any format is accepted. Leave blank if not required. |
| deviceRegistrationQuota | The number of new mobile devices the user may register. Defaults to 0, so no devices, for a new user. See the Deploying Tamanu configuration guides. |
| visibilityStatus | current for active users, or historical to deactivate the user. Defaults to current if blank. A deactivated user cannot log in, and their name stays against everything they recorded. |
| designations | The id of each of the user's designations, from the Designation tab, separated by commas. Each must exist and be current, or the row errors. Leave blank for none. |
| allowedFacilities | The id of each facility the user is linked to, separated by commas. Leave blank to link the user to no facilities. What a link grants depends on the facility access settings: see Facility access. |
| password | The password the user logs in with. Needed to create a user who can log in, but not checked by the importer, so a new user imported without one cannot log in until a password is set. Leave blank when updating a user to keep their current password. |
On re-import, the designations and allowedFacilities columns replace the user's existing values
rather than adding to them. A blank cell removes all of the user's designations or facility links.
An export writes designations and allowedFacilities back as comma-separated ids, so an exported
sheet re-imports unchanged. An export has no password column, and re-importing it leaves every
user's password as it was.
Managing users in the admin panel
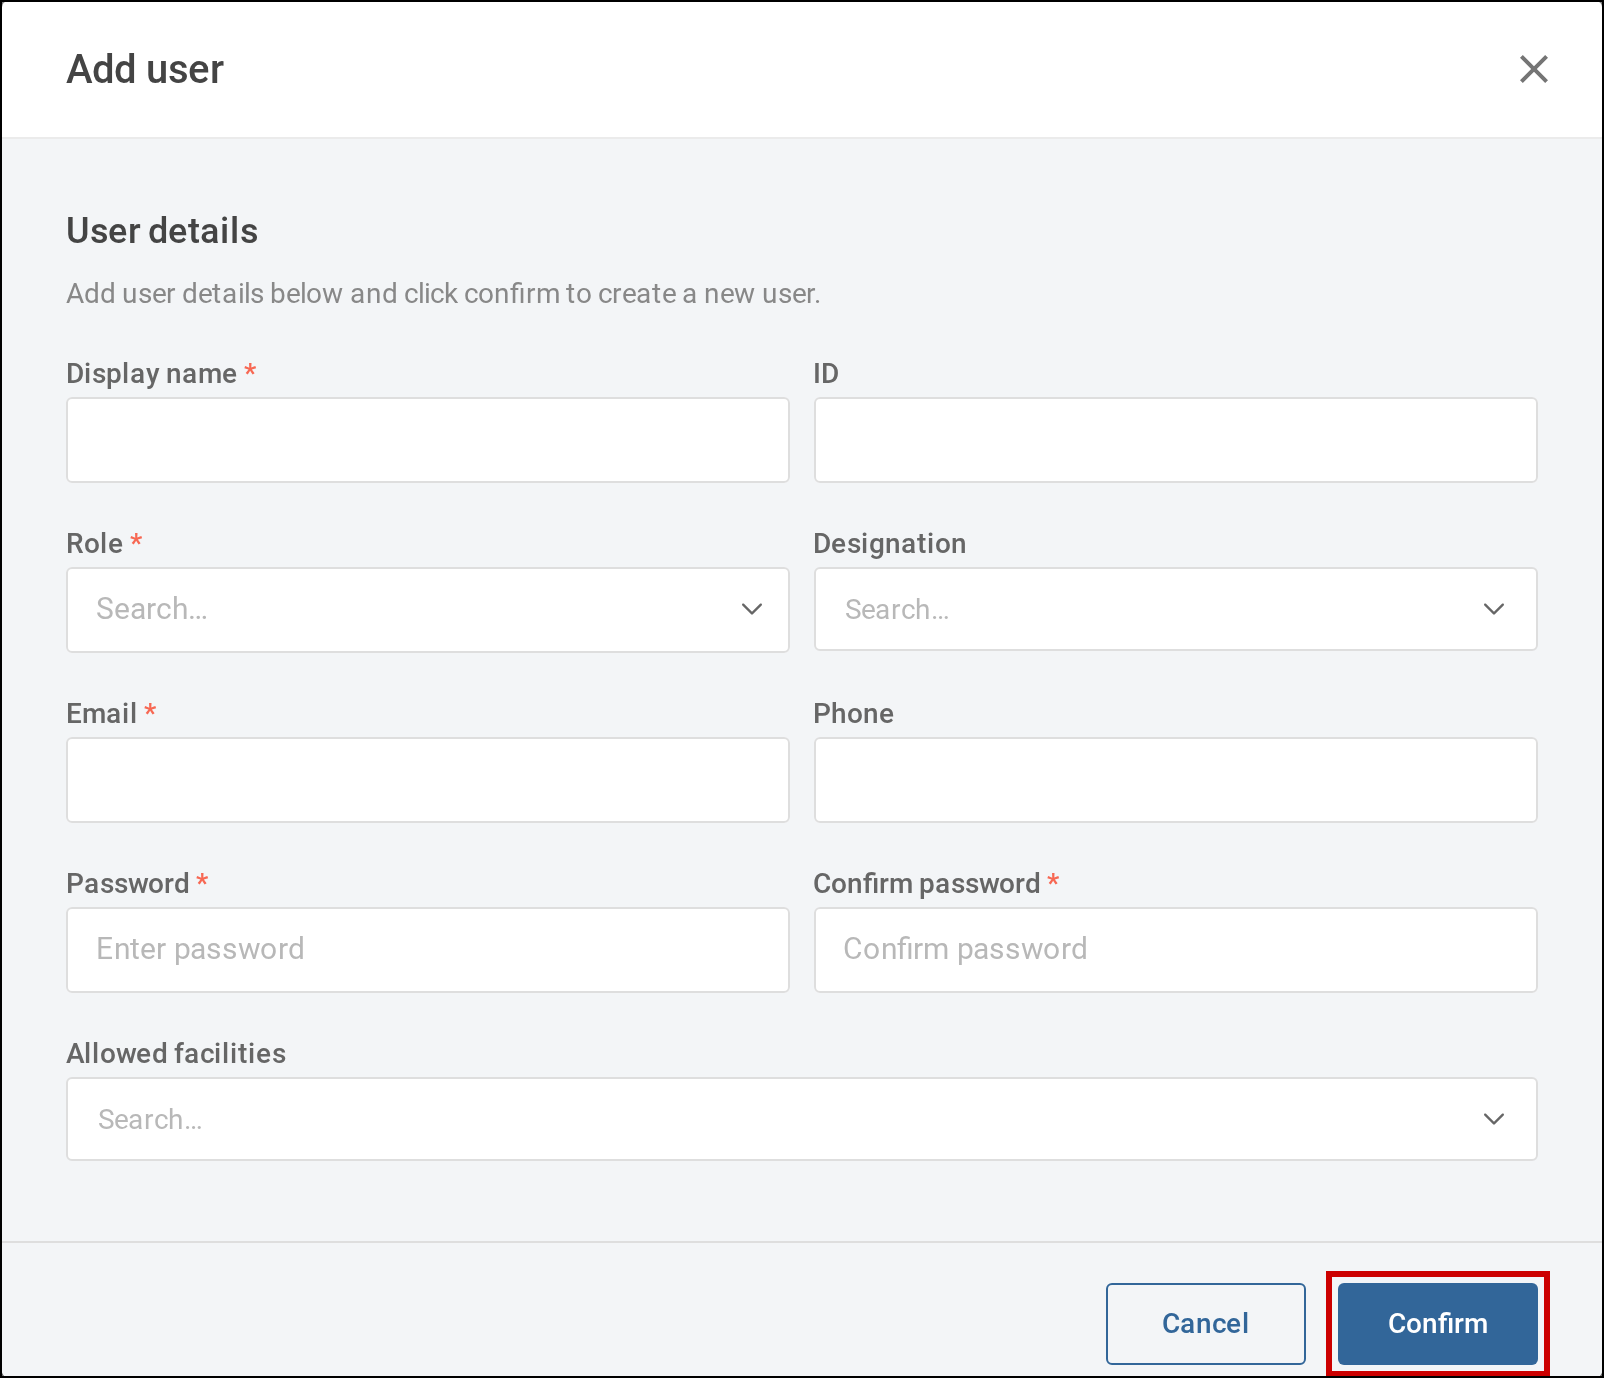
Users can also be added and edited one at a time on Users > User profiles.
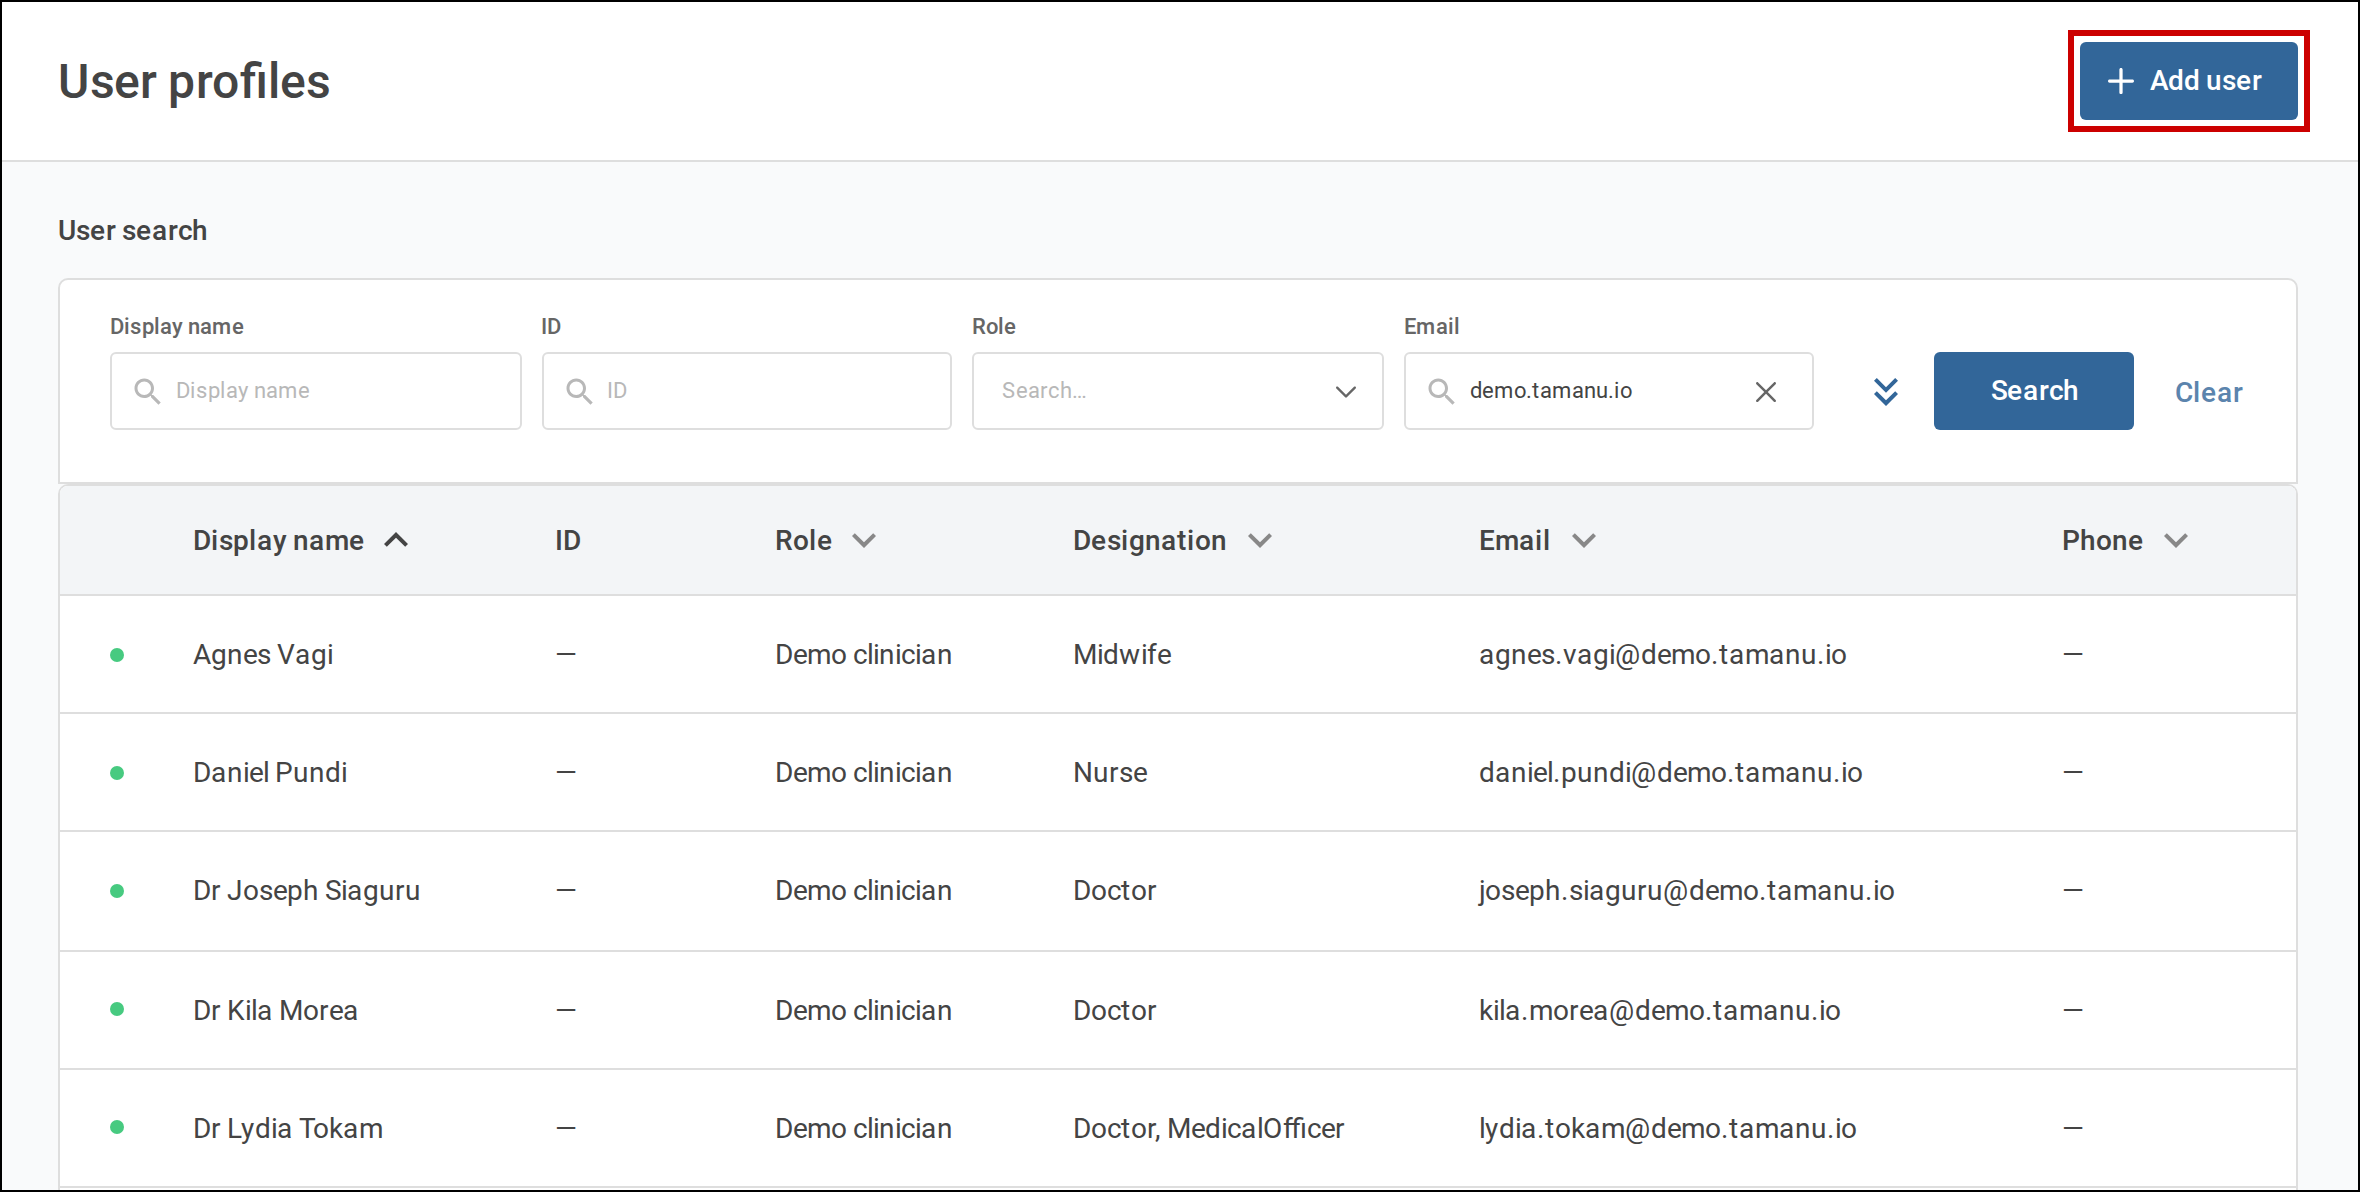
Adding a user
Select Add user and complete the form. Display name, Role, Email, Password and Confirm password are required. Email and Display name must each be unique, and display names are compared ignoring case. Designation and Allowed facilities each accept several values.
Editing a user
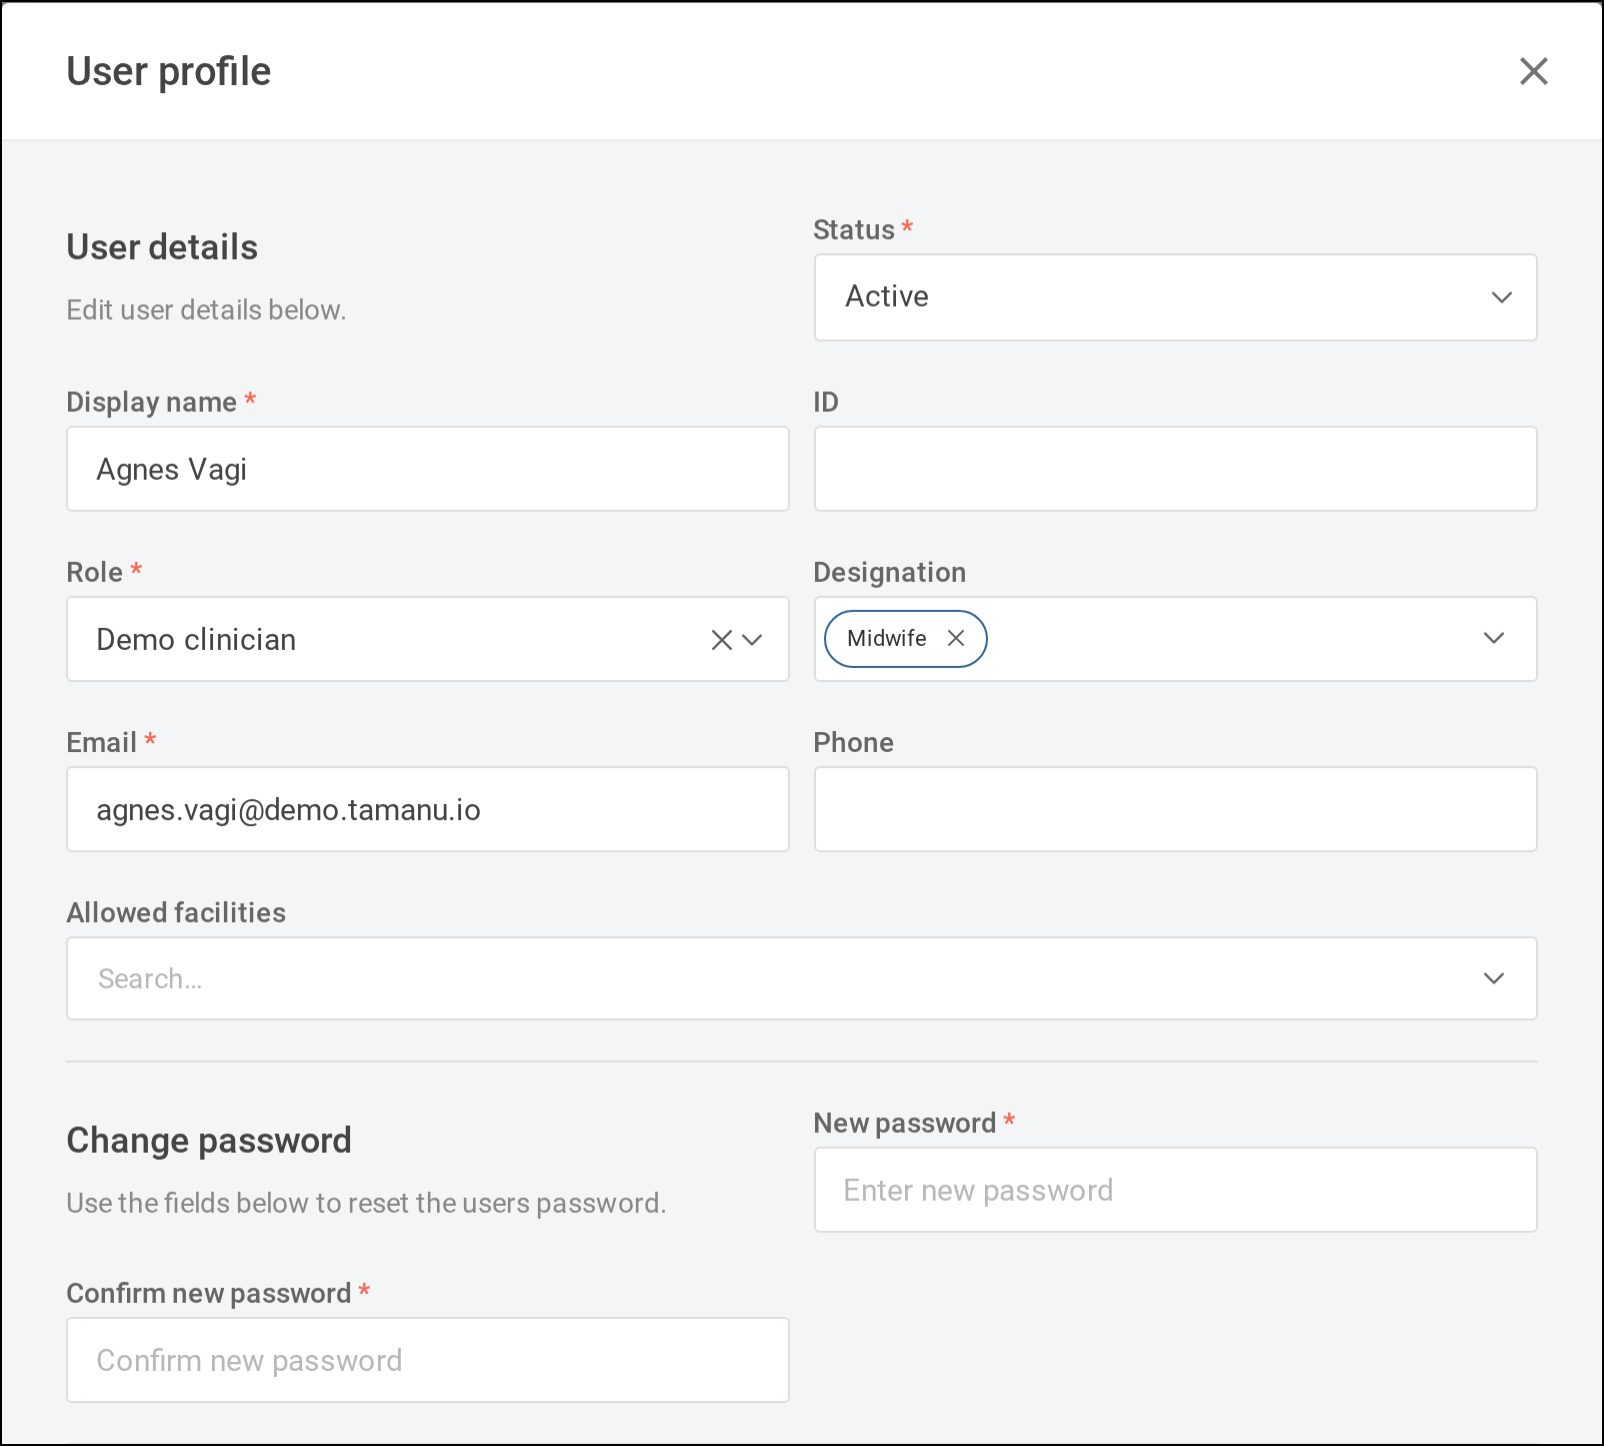
Select a user's row to open their User profile. The same fields can be changed, and:
- Status deactivates a user, by changing it from Active to Deactivated
- Change password sets a new password. Enter it in New password and Confirm new password
Confirm appears once a change is made. Select it to save, or Cancel to discard the changes.
The device registration quota is set on the User tab only.
A user who edits their own profile is warned if the new role would remove their permission to edit user profiles. If they continue, another user with that permission must change their role back.
The accounts facility servers use to sync are not listed and cannot be edited here.
Scheduling leave
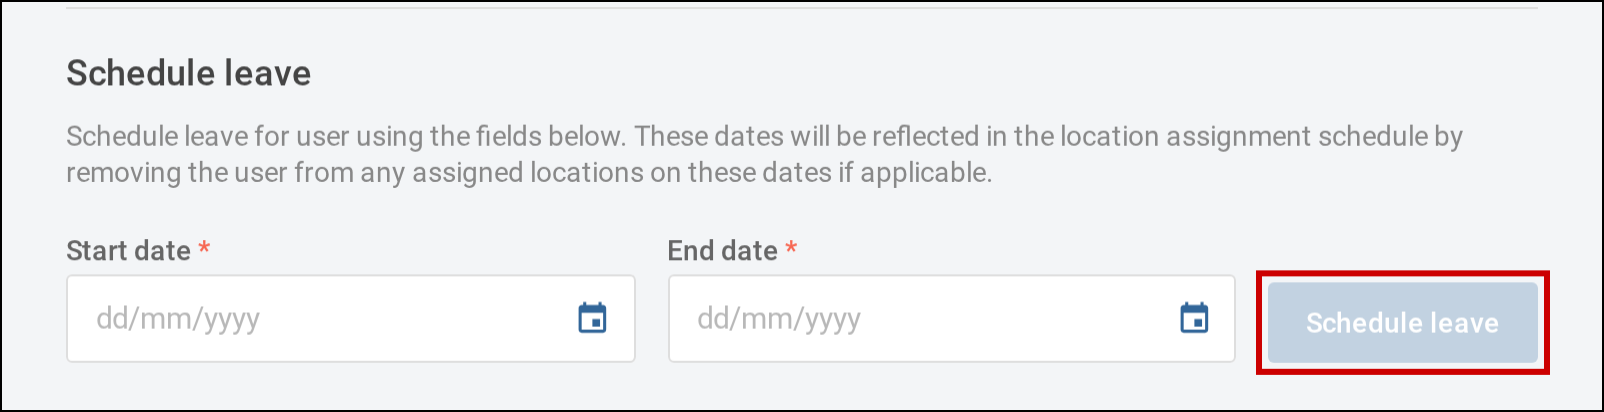
Leave marks a user as unavailable for a range of dates. In a user's User profile, enter a Start date and End date under Schedule leave and select Schedule leave. For a single day, enter the same date twice. Leave cannot be scheduled in the past, or overlap the user's existing leave.
Scheduling leave removes the user from any locations assigned to them on those dates. Upcoming leave is listed under Upcoming scheduled leave, where Remove cancels it. See the Scheduling configuration guides for location assignment.